|
|
Hasselblad Gear 1977 to 1985 |
|
|
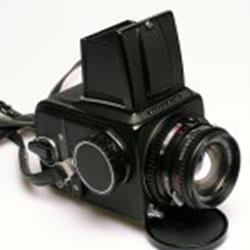
500 CM When I started doing
wedding on a full time basis, I decided to switch from the Rolleicord TLR to a medium format SLR and Hasselblad was
the one to use. Great local support
through Braun Canada. Replace standard film winding knob with the fold out
crank I decided black was a
nice touch on the body. STATUS: Display case |
|
|
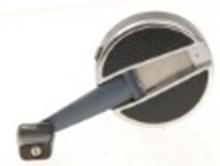
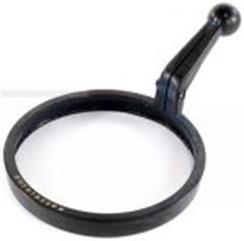
Quick winding crank Standard round knob comes off and this crank goes on, much
faster to advance film and cock shutter on the 500 CM STATUS: Display case |
|
|
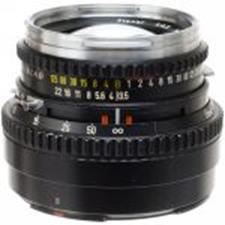
50mm f4 T* Wide angle lens From past experience I knew I needed something wider than 80mm,
and this 50 mm was perfect. Just wide
enough for large groups, but not going to distort. STATUS: Display case |
|
|
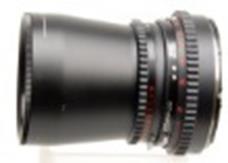
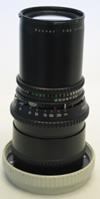
100mm f3.5 T* Long Normal lens I looked at the very common 80 mm version, and talking to some
tech support people, learned that their new 100 mm was sharper, and had
almost zero distortion. And, since I
was also doing aerial photography (having a pilot’s license helps). This lens
would work out the best. STATUS: Display case |
|
|
250mm f5.6 T* Telephoto lens Added an optional focal length for some tight cropping STATUS: Display case |
|
|
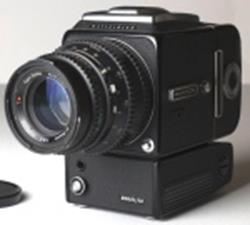
500 ELM I needed a backup body, could not trust shooting a wedding with
only one body at hand. (but I never needed it). At a seminar I saw this body in
action. Electric remote shutter
release, takes all same stuff as the first body. Perfect for portraits and other studio work STATUS: Display case |
|
|
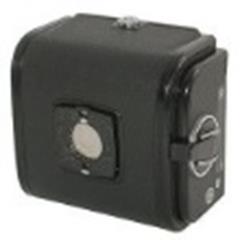
A12 film packs Unlike my 35mm gear, these cameras use removable film packs that
can be swapped on or off with film in them.
So, I purchased two of them, each taking 12 exposures on size 120
film. I felt that I would rather have
more rolls of film for a wedding or other job and if a processing fault
happened, I didn’t lose as much. It
also allowed me to split a wedding ceremony and other critical events onto
two films. Always keep the spare loaded while shooting, so I could swap new
pack in quickly, and reload the other pack during a short break. STATUS: Display case |
|
|
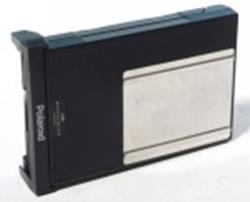
Polaroid film pack In the digital world now you can look at the results of a shot
on the back screen, check exposure etc.
Back then you put a neutral density filter in from of the lens to
lower the effective speed of the polaroid film down to match the colour film
was shooting with, take a shot and check. STATUS: Display case |
|
|
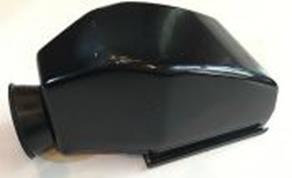
Eye level prism finder The fast pace of a wedding is not the place to try to use a
waist level finder other than group shots. So I got this type of finder for
the top of my 500 CM. STATUS: Display case |
|
|
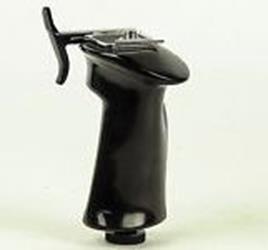
Pistol grip for body Making life easier, using this type of grip allowed for much
faster shooting. I added a bracket to
the top to allow the flash gun to fit to the right side of camera and clear
the film winder. I also got a similar for the ELM, but didn’t use it very
much. STATUS: Display case |
|
|
Bellows type lens hood Not only did this device protect the front element from stray
light, but I had a series of slides that would fit into the front. Using double exposures I could put the
bride/groom pair into an outside shot of the church, or with heart shaped cut-out,
make the out of focus flame of candles in the background of the rings/hands
take the shape of hearts. Lots of
uses. Also this is where I put the ND
filters for the Polaroid back STATUS: Display case |
|
|
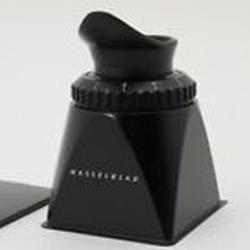
Studio chimney style viewfinder with adjustable
eyepiece focus This viewfinder worked very well for studio work, or outdoor
work where I was setting up the shot, lots of time, and the design of the
hood completely blocked outside light. In later days I have used this hood on the rear of some of the
Canon DSLR when shooting video. STATUS: Display case |
|
|
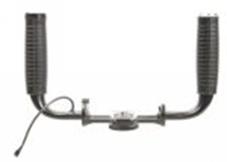
Double Hand grip for ELM I got this for aerial photography and another places where I
needed to have a good grip on the camera.
The top of the one handle has a shutter release button during shooting
you only needed to aim and push the button. STATUS: Display case |
|
|
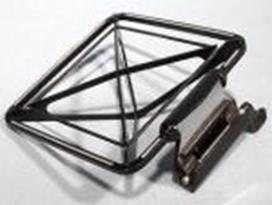
Sports finder This finder was designed for use with longer lens, it clips to
the front top edge of normal lens hood as supplied with the lens. You line up the lines and shoot away. Mostly used for aerial photography. You can
clearly see the surrounding area, and what is inside the picture area. STATUS: Display case |
|
|
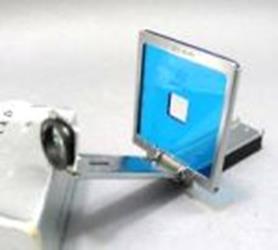
Sports finder for shorter lens. This finder goes on the side of the body in the special mount
place that is there. You select a mask
(the blue part) to match the lens you are using, you move the eyepiece part
back and forth to the correct marked focus distant. Simple.
With either sport finder you have clear view of the surrounding action
and still know what is inside the picture area. STATUS: Display case |
|
|
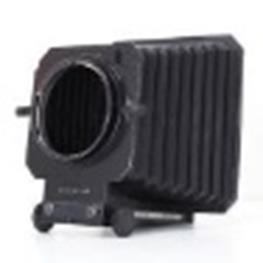
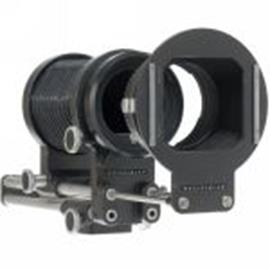
Macro photography bellows Since I had my darkroom setup to print colour photos quickly
from medium format film, (and 35mm), and I had thousands of colour 35mm
slides, I used this device with the 100 mm lens to make an inter-negative of
the slide that I then printed from. STATUS: sold |
|
|
Quick focus handles These simple handles fit onto the focus ring of the lens and
allow fast and easy adjustment of the focus. They came with little coloured
markers that you could put at specific focus distances. STATUS: Display case |
|
|
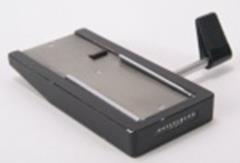
Quick tripod release adapter This device was attached to the top of the tripod, and the
camera body which has special plate on bottom (they think of everything)
simply slides on and locks. Flip the
lever and remove body. STATUS: Display case |
|
|